Gotta catch 'em all!
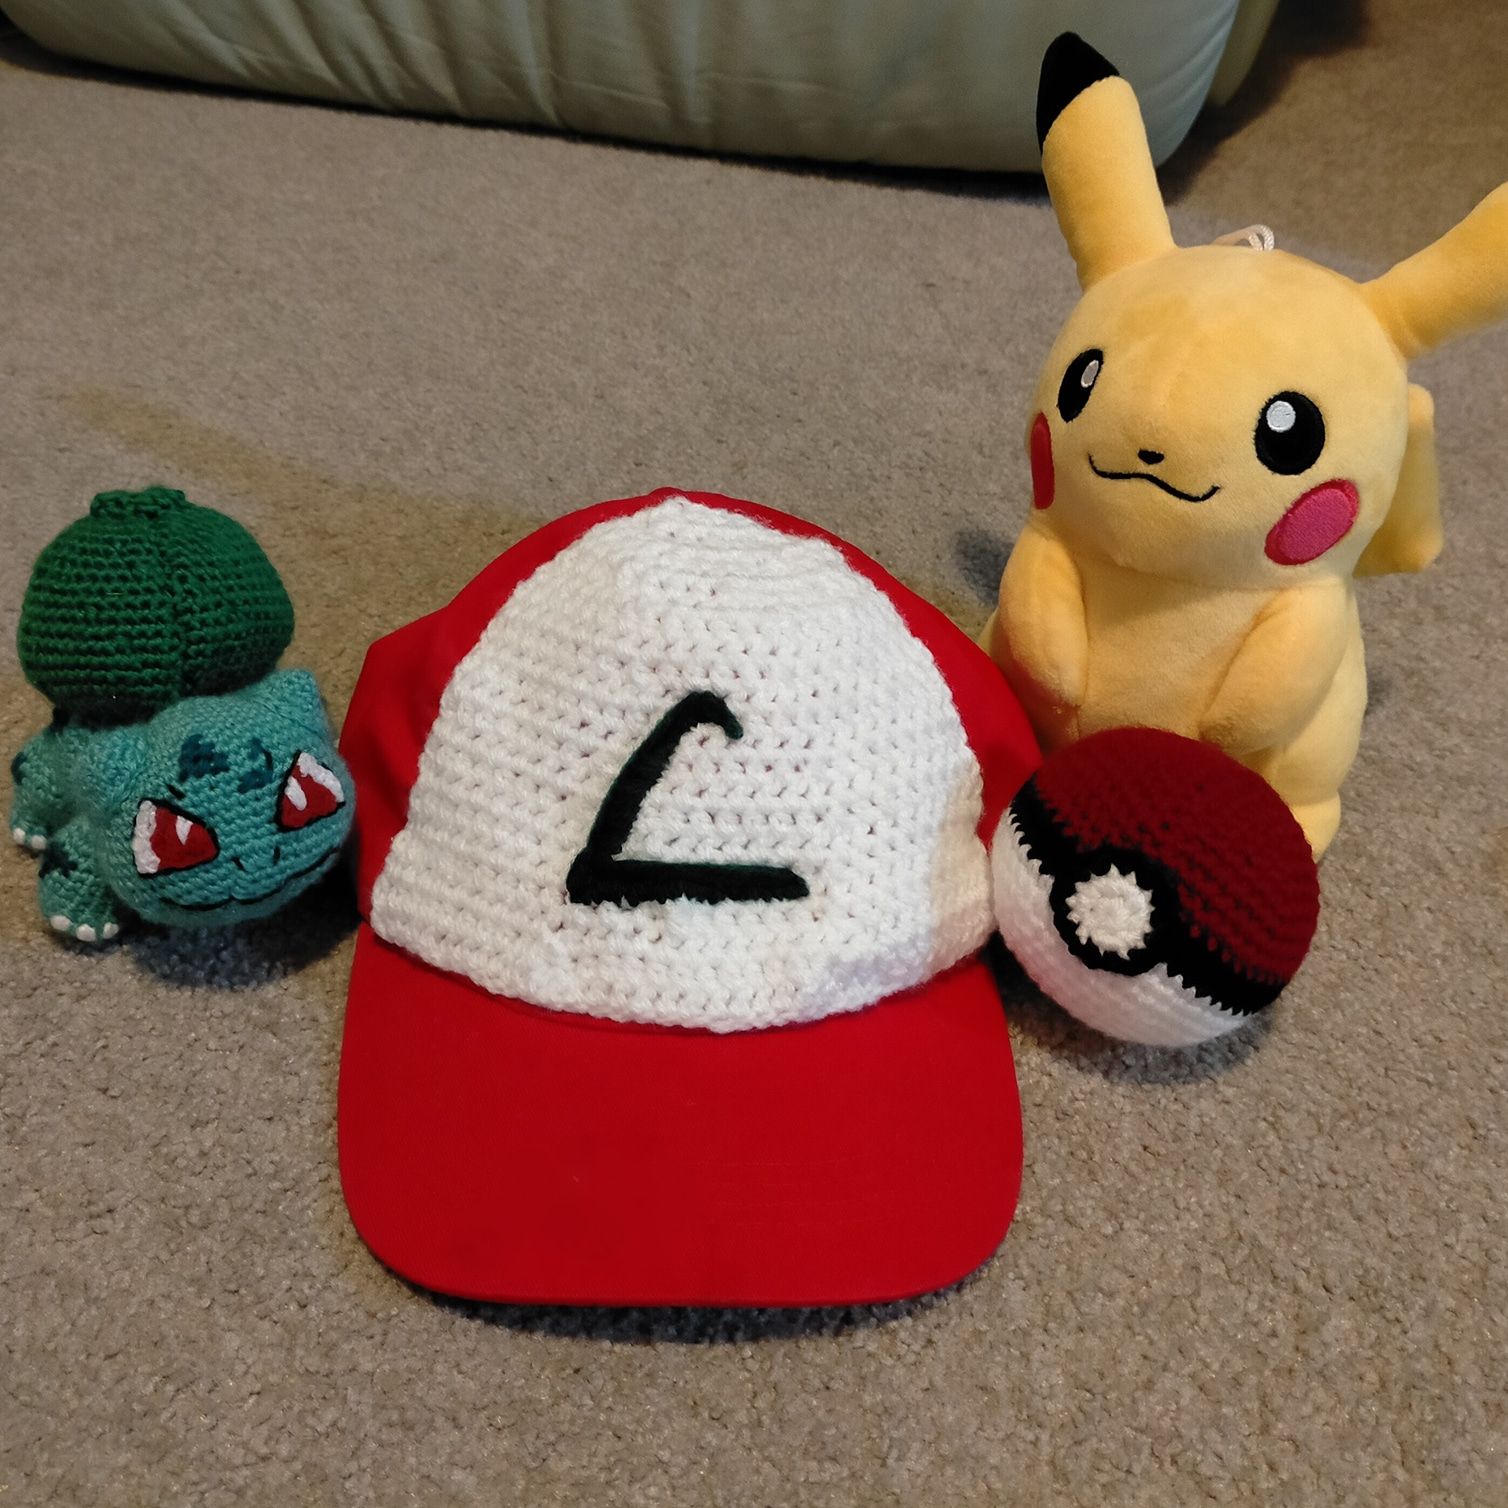
Here are the patterns for Ash's cap and a pokeball. Feels great to turn the cap and hiff the pokeball!
Ash's Pokemon Cap
What you'll need:
- White 8 ply
- Dark Green 8 ply
- 3.75 hook
- Adult one size red cap
Stitches used (US terms):
Hdc - half double crochet
Sl st - slip stitch
Ch - chain
Sc - single crochet
Worked in rows, ch 1 and turn the work at the end of each row
1. 35 ch (35)
2. Start in the second ch from hook, 35 hdc (35)
3. 10 hdc, hdc decrease, 11 hdc, hdc decrease, 10 hdc (33)
4. 9 hdc, hdc decrease, 11 hdc, hdc decrease, 9 hdc (31)
5. 9 hdc, hdc decrease, 9 hdc, hdc decrease, 9 hdc (29)
6. 29 hdc (29)
7. 8 hdc, hdc decrease, 9 hdc, hdc decrease, 8 hdc (27)
8. 27 hdc (27)
9. 7 hdc, hdc decrease, 9 hdc, hdc decrease, 7 hdc (25)
10. 25 hdc (25)
11. 7 hdc, hdc decrease, 7 hdc, hdc decrease, 7 hdc (23)
12. 23 hdc (23)
13. 11hdc, hdc decrease, 10 hdc (22)
14. 22 hdc (22)
15. 7 hdc, hdc decrease, 4 hdc, hdc decrease, 7 hdc (20)
16. - 17. 20 hdc (20) i.e. 2 rows
18. 6 hdc, hdc decrease, 4 hdc, hdc decrease, 6 hdc (18)
19. 2 hdc, hdc decrease, 3 hdc, hdc decrease, 3 hdc, hdc decrease, 2 hdc, hdc decrease (14)
20. 14 hdc (14)
21. *3 hdc, hdc decrease* 2 times, 4 hdc (12)
17. *2 hdc, hdc decrease* 3 times (9)
18. * hdc decrease, 1 hdc* 3 times (6)
19. hdc decrease, 2 hdc, hdc decrease (4)
20. 4 sc, sl st to finish. Leave a long thread for stitching to the cap.
Attach to the red cap with the long final thread and a sharp darning needle.
Use the sharp needle and dark green 8ply to embroider the symbol on the front of the cap.
Pokeball
What you'll need:
- White 8 ply
- Red 8 ply
- Black 8ply
- 3.75mm hook
- Polyester filling
Worked in rounds.
1. 6 sc into magic ring (6)
2. *2 sc in 1* 6 times (12)
3. *1 sc, 2 sc in 1* 6 times (18)
4. *2 sc, 2 sc in 1* 6 times (24)
5. *3 sc, 2 sc in 1* 6 times (30)
6. *4 sc, 2 sc in 1* 6 times (36)
7. *5 sc, 2 sc in 1* 6 times (42)
8. *6 sc, 2 sc in 1* 6 times (48)
9. - 11. 48 sc (48) i.e. 3 rows
Change to black
12. - 13. 48 sc (48) i.e. 2 rows
Change to white
14. - 16. 48 sc (48) i.e. 3 rows
17. *6 sc, sc decrease* 6 times (42)
18. *5 sc, sc decrease* 6 times (36)
19. *4 sc, sc decrease* 6 times (30)
20. *3 sc, sc decrease* 6 times (24)
Stuff with polyester filling.
21. *2 sc, sc decrease* 6 times (18)
22. *1 sc, sc decrease* 6 times (12)
23. 6 sc decrease (6)
Sl st to finish and weave in ends to close the hole.
Button on the ball
White 8ply, 3.75mm
1. 6 sc into magic ring (6)
2. *2 sc in 1* 6 times (12)
Sl st to finish
Change to black and reattach to edge the circle
3. 12 sc (12)
Sl st to finish. Leave long thread to attach to the ball part - place over the spot where there had been colour changed at the end /start of the rows. Use a darning needle to sew it in place.
Please feel free to share your creations from this pattern and tag me on Instagram @wherethewoolthingsare . Cheers!


Comments
Post a Comment